
Before proceeding, we'll need the following items to complete the process:
- 8GB USB Flash Drive (or SD Card)
- Install OS X Mountain Lion.app (installer downloaded from Mac App Store)
- Apple computer with Mac App Store (OS X 10.6.8+)
- User Account with Administrative privileges
Follow these steps:
1. Using a Mac with at least OS X 10.6.8 installed, access the Mac App Store and download the Lion (10.7) or Mountain Lion (10.8) app installer.
2. Insert the USB drive into the Mac and launch Disk Utility.
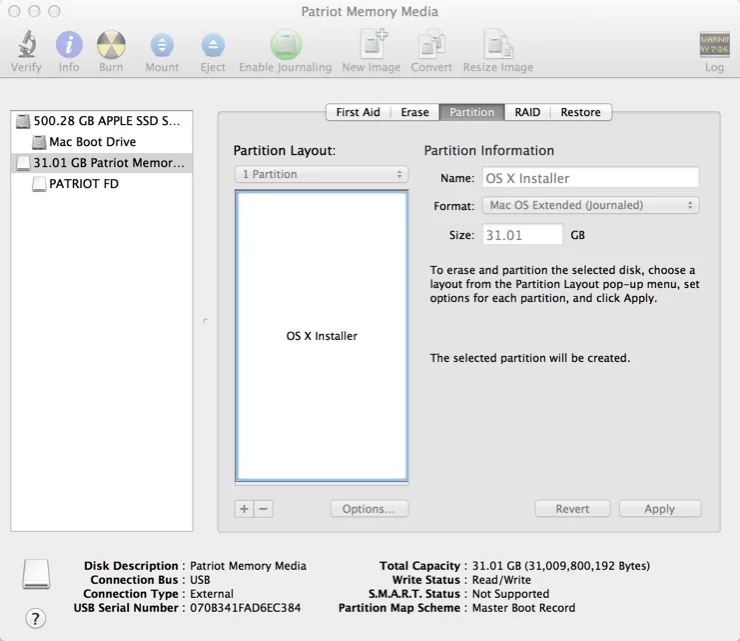
3. Click on the USB drive from the left-hand menu and select the Partition tab.
4. Click the drop-down menu, selecting 1 partition.
5. Select Mac OS Extended (Journaled) for the format-type from the drop-down menu.
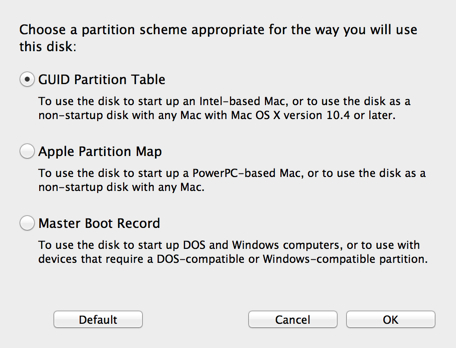
6. Click on the Options button and select the radio button for GUID Partition Table and click OK.

7. Upon completion of the USB formatting, locate Install Mac OS X Mountain Lion.app (downloaded in step #1 to the Applications folder, by default). Right-click the file and select Show Package Contents.


8. Navigate the file structure Contents | Shared Support and drag the InstallESD.dmg file to the desktop.

9. Go back to Disk Utility and click on the newly formatted USB Drive in the menu, then click on the Restore tab.
10. In the Source textbox, click the Image button and select the InstallESD.dmg file on your Desktop. For Destination, drag & drop the partition created on the USB drive onto the textbox.
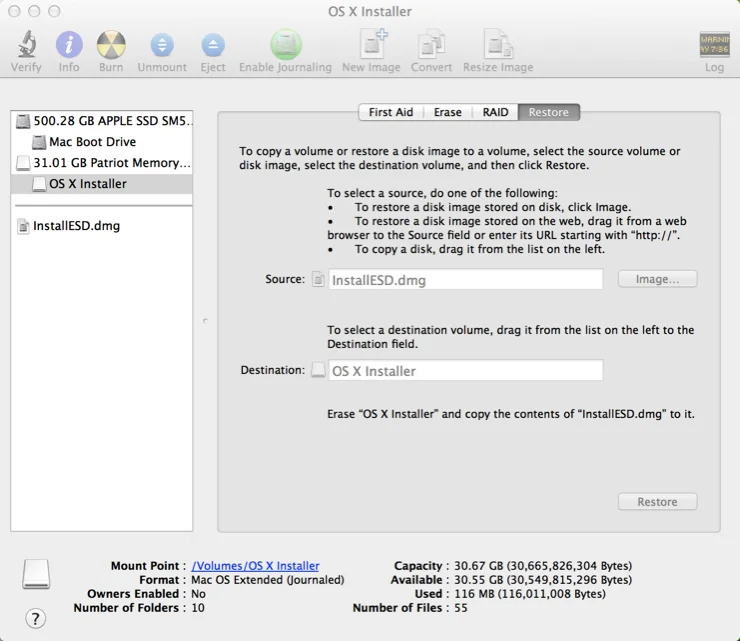
11. Upon verifying that the fields are correct, click the Restore button and select Erase from the application, if prompted to do so.

12. The process may indicate in excess of one hour, but in my experience the process takes significantly less time to complete.

13. After the restore has completed, the Mac OS X Install (On USB Drive) will auto-mount. You can now unmount and remove this USB drive.
