I have outlined the complete process below to setup Dynamic DNS, Router Port Forwarding and Windows Remote Desktop to access your vSphere (Or Any) environment behind your home router from anywhere in the world for $25 .00 annually.
Dynamic DNS Configuration
1. Create a DynDNS account at http://dyn.com/remote-access/.
Dynamic DNS Pro - ($25.00 for 1 Year) - http://dyn.com/remote-access/
• Up To 30 Unique Hostnames
• Rapid Propagation
• Premium Domains
Custom DNS is also available - http://www.dyndns.com/services/dns/custom/


4. Select a Hostname along with one of the free available domains, Host with IP Address for the Service Type and select "Use Auto Detected IP Address x" which is your public WAN IP Address. Finally, select the Add to Cart button.

5. Select the Next button to check out of the Shopping Cart.

6. Select the Activate Services button at the Free Services Checkout page.
7. You will then be brought to the Host Services page which will display the Hostname to WAN IP Address.

Personal Router Configuration
8. Login to your personal router and go to the Dynamic DNS section. I used a Netgear WNR3500 Gigabit Router ($99.99) athttp://www.newegg.com/Product/Product.aspx?Item=N82E16833122220). The Dynamic DNS Service is the most reliable but you can also install the service/software at https://www.dyndns.com/support/clients/ on a host. The supported hosts are Windows, Max OS X, Linux and UNIX. This service is very important since it periodically checks your network's WAN IP address; if it sees that your WAN IP address has changed, it sends (updates) the new IP address to your hostname in your DynDNS.com account.
While still in the Dynamic DNS window on your router..
-Check mark Use a Dynamic DNS Service to enable the Dynamic DNS feature on your router.
-Enter the hostname that you created on your DynDNS account from step 4.
-Enter the username and password for your DynDNS account from step 1.
-Select the Apply button.

9. Go to the Port Forwarding / Port Triggering section on your router. Create a Port Forwarding entry. In this example, I have created a Service called Remote_Desktop, Start \ End Ports of 3389 for RDP and the Server IP Address of my Virtual Machine which could be your vCenter Server.
Note: I have only gone through the process to setup Remote Desktop but many other ports can be forwarded. A full list of ports is available at http://www.portforward.com/cports.htm.

Virtual Machine Configuration
10. Go to a command line and ping your full domain name. It should resolve back to your WAN IP Address.
Note: You will only get a reply while on your local network and not from outside of your local network.
C:\>ping vm-demo.dynalias.com
Pinging vm-demo.dynalias.com [76.92.201.8] with 32 bytes of data:
Reply from 76.92.201.8: bytes=32 time=5ms TTL=128
Reply from 76.92.201.8: bytes=32 time=5ms TTL=128
Reply from 76.92.201.8: bytes=32 time=7ms TTL=128
Reply from 76.92.201.8: bytes=32 time=8ms TTL=128
Ping statistics for 76.92.201.8:
Packets: Sent = 4, Received = 4, Lost = 0 (0% loss),
Approximate round trip times in milli-seconds:
Minimum = 5ms, Maximum = 8ms, Average = 6ms
11. Go into System within the Control Panel and enable Remote Desktop by selecting the Remote tab, check mark Allow Users to Connect Remotely to This Computer under Remote Desktop and then select Users to allow within the Select Remote Users button. Once completed, select the OK button to apply.
Note: I occasionally turn off the Windows Firewall under Windows Firewall within the Control Panel to test network connectivity. The ability to ping over the LAN is not available while the Windows Firewall is in use. After completing your testing, re-enable the Firewall. There was a Remote Desktop Exception created within the Windows Firewall when we enabled Remote Desktop.
Remote Connection
12. Disconnect from your direct connect or Wireless network and connect via a broadband card or via a network outside of your home. I am using a Verizon WWAN card.
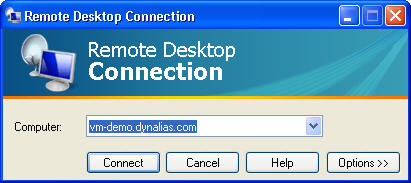
13. Via the Windows Remote Desktop Connection client, list the host and domain name that you created in step 4. The host and domain name that you created in step 4 will resolve to your WAN IP Address and forward the Remote Connection onto Port 3389.
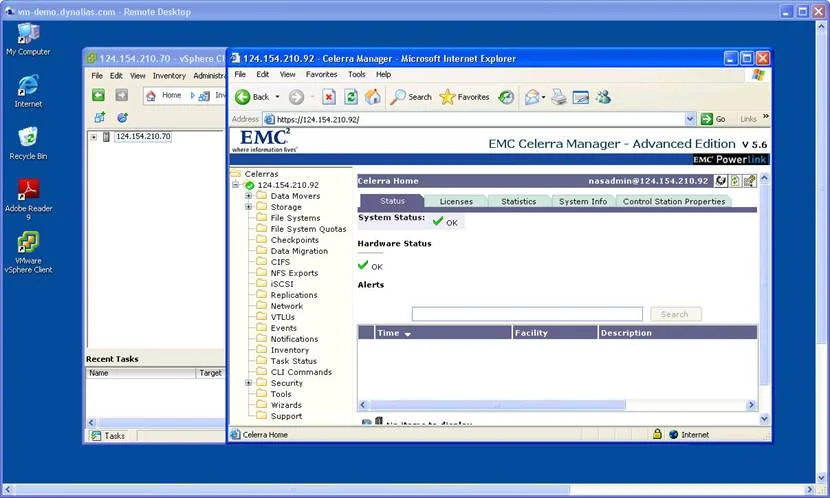
14. You are now connected to your Virtual Machine desktop. This is just an XP Virtual Machine that I will use as a portal to launch the vCenter Client. I have shown the example below of a single vSphere Node before I add it to vCenter along with the GUI of my Primary Celerra and VNX Simulator.